Showing posts with label Scenery. Show all posts

Wednesday, 24 February 2021

Advertising posters for your model railway

Advertising signs and posters are a great way to set the scene and give a location a sense of place and time. Signs and advertising accompanied by era specific vehicles and people can provide visual context and enhance the believability of your model railway.

We can use commercial decals or signage within structure kits of course. But for more unique offerings, finding suitable images is very possible using the internet. We can also be on the lookout for suitable images when travelling around the countryside (covid-19 permitting), as I discovered on a recent visit to Boorowa and one of the local pubs.


There are other sources of signage and advertising when going through antique stores (subject to permission) or second-hand stores. And libraries remain a useful resource for searching as well.

Recently, I received an email from the National Library of Australia alerting me to the Australian advertisement poster collection they have collected and preserved over time. A sample of early posters can be found here with a link within the story to the collection accessible via Trove. 

Enhancing a model railway with signs and advertising suitable for the location and time period is a very good way to create a realistic and believable scene.

Addendum: A few hours after posting this blog entry, I came across this Youtube clip about weathering billboards that might be of additional interest. It's from a Youtuber I follow and he has some other interesting modelling techniques based on a small switching layout he constructed. Very nice!

Sunday, 29 March 2015

Canberra Model Railway Expo - postscript

The Canberra Model Railway Expo is over for another year. The 2015 expo was a very enjoyable exhibition. The event was well organised with good parking (special thanks to the volunteers on duty all weekend), a great variety of model railroads scattered throughout the school, and just enough commercial vendors to keep me within budget (hey, my wife may read this!). Special thanks to Ian from Micro Models Hobbyland at Hornsby and Gary from Model Railroad Craftsman at Blacktown for ferrying some goodies to Canberra for me. In addition, catching up friends and fellow railway modellers was also part of the terrific weekend experience.

There were 25 layouts on display according to my count. I saw them all and this time I spent much of my time looking at the detail in the scenic displays. This included the natural vegetation, the industries and other buildings, as well as different cameo scenes. The hobby of railway modelling is indeed a very creative pursuit.

Now, before we get into the photos from a sample of layouts, let me confess that the camera I used today is a very old point-and-shoot because I have "misplaced" the other 2014 camera. I am still searching the house for that camera and hopefully I will find it before next year's Canberra model railway Expo!

And now some detail shots that I quite like from a selection of layouts:

Layout: Electric Car Sheds (NSW, HO scale)


Layout: Springfield Junction (USA, HO scale)


Layout: 12th Street Yard (USA, HO scale)


Layout: Brunswick Park (NSW, HO scale)


Layout: Tanoden (Japan, N scale)


Layout: Moose Jaw Southern (Canada, N scale)


Layout: 638 Mile (NSW, HO scale)


Layout: Western Front 1917 (France, HO scale) - displayed along with an accompanying video of the real WWI trains and railroad construction as part of the NMRA information stand.


In summary, the Canberra Model Railway Expo was a great weekend. Thank you to the club members of the Canberra Model Railway Club Inc. (CMRCI) and to all the volunteers who helped make the event such a success.

Wednesday, 5 May 2010

New Zealand Model Railway Convention - Part 3

The third day of the New Zealand Model Railway Convention in Christchurch was Sunday 4th April. The weather had turned cold and overcast which was a pity since the afternoon activity included a trip to Ferrymead Heritage Park and some 1:1 steam train action. More on that later.

The morning clinics included "Freelance modelling", "Desert scenery", "Image manipulation", and "NZ scenery". I went to the clinic on New Zealand scenery and I was not disappointed. Barry Fitzgerald and John Dudson gave a great presentation on making and displaying some typical New Zealand trees and vegetation. Referring to my notes, I recorded the following dot points:
  • look for particular motifs specific to the location you're modelling - helps to identify the location and give credibility to the scene - but motifs need to complement each other
  • look for typical scenery and the familiarity of everyday life
  • study the local architecture and apply to your modelling
  • "detail is not overcrowding"
  • provide for lineside interest (e.g. cameo scenes)
In particular, the presentation demonstrated the making of New Zealand cabbage trees using the paper star method (a method that seemed to be recognised by my New Zealand compatriots but not by me!). The technique goes something like this:
  • use paper or thin cardboard (the suggested paper thickness was 80-85 gsm) to cut out a round-shaped disc of a size suitable for your cabbage tree foliage in your scale (S scale in this example)
  • divide into quadrants in order to ensure even cuts around the disc to create "leaves"
  • use scissors for the cutting (be careful not to cut through the centre or you won't have a disc anymore, but only part of a disc)
  • put a pin through the centre (hence the "paper star" look)
  • fold the "leaves" back and repeat process with more discs to build up layers of foliage until you have sufficient for your tree head
  • you can add a lower fringe of grey paper "leaves" to represent dead or dried fronds
  • select a suitable twig for the trunk and secure the "paper stars" head using PVA glue
  • add additional fronds with green paper to the top using the same paper star method
  • tease out the "leaves" or fronds to match the shape of the real-life cabbage trees
  • paint paper stars shades of green or brown or yellow as appropriate
  • add cabbage trees together in clumps on your layout
More scenery tips:
  • build scenery on the layout from the ground up
  • look for colour, texture, and variety (e.g. at every step you have a colour option)
  • static grass is a good scenery method but use different shades of scenery flock
  • important to blend colours to overcome the "same look" (a suggestion was to make up a colour chart of colour shades, particularly in the green and brown colour ranges)
  • use rock moulds for modelling rock outcrops but pay attention to colour shades (recommend using Woodland Scenics colour range of paints)
  • for concrete, "Tradeset 45" plaster recommended (sets in 45 minutes)
There was also a demonstration of making a conifer using a suitable stick and "sea foam".

The second session of clinics on Sunday morning included "Track matters" with Iain Rice, "Modelling in the garden", Adapting RTR locos", and "Operation NZ style". I attended this latter clinic on model railway layout operation by Trevor James. Trevor based his talk on his own S scale NZR prototype layout, currently under the moniker of "My layout"! Trevor introduced his (absolutely beautiful) layout with a track plan and photos, based on a fictional railway line between Auckland and Wellington (on the North Island). The track plan looks like a figure eight in the middle of a surrounding single main line and featuring two big towns (Waimarino and Tipapa Junction) and end points (Auckland and Wellington) as off-scene staging.

Trevor explained how he applied the common US model railway operation method of cards and waybills. The planning process and use of an operating system went something like this:
  • a point-to-point layout with two main intermediate towns towns, a couple of smaller settlements, and off-scene staging at both ends representing Auckland and Wellington
  • a "wish list" determined key features on the layout (e.g. a wharf scene, bridges, farming, a swamp, industries, etc.)
  • it was also important to give the layout a reason-for-being (e.g. traffic generation)
  • establish appropriate industries and position on the layout
  • design a timetable for trains on the layout ( time a locomotive as it runs around the layout and get times between stations; then using a train in each direction, build up a sequence of trains and times)
  • establish type of train (express goods, etc.) and position in the timetable
  • trial and error will help set an acceptable timetable from which to work from
  • further detail can be added to include instructions on what to do at particular locations throughout the layout, taking into account other trains that might also be around (this layout operates one train in each direction with single line running)
  • draw up work orders for each train, based on the type of wagons you have, the industries to serve, and the timetable
  • from what I recall, the information was initially put into Microsoft Excel
  • later, Trevor experimented with a computerised car card system called ShipIt
  • ShipIt requires lists of rolling stock, locomotives, guards vans, trains, towns, shippers, products, consignees, etc.
  • inputing all the necessary information into ShipIt was tedious and repetitive but Trevor said he would persevere!
  • the conclusion of the talk was that creating a focus on operation was a realistic and enjoyable way to run trains on his layout
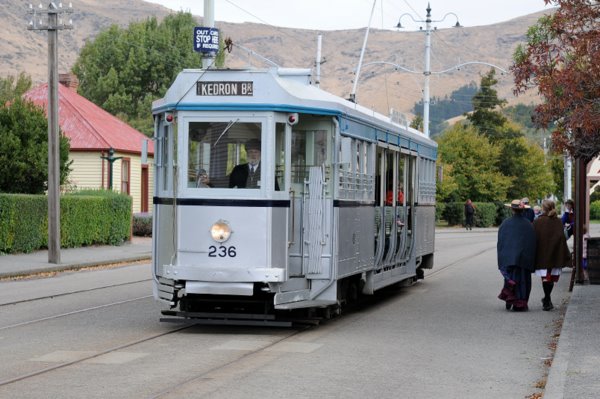
After lunch, there was another afternoon of layout tours to enjoy. The layouts I visited were in the New Brighton area of Christchurch and included British N and OO gauge, US N and G scale, S and O scale NZR, and a huge HO/OO/S layout that had examples of pretty much all the major model train prototypes from across the world! Afterwards, we had time to visit Ferrymead Heritage Park. I have included some pictures from Ferrymead below, including the two steam locomotives in operation on the day


The last photo shows my NZ compatriots (the three chaps at the back) with whom I enjoyed a pleasant Sunday afternoon visiting home layouts and the wonderful Ferrymead Heritage Park. Thank you, one and all.