Showing posts with label Operations. Show all posts

Sunday, 1 February 2015

Rules and playing the game

As mentioned in my previous blog post, I went to Cancon in Canberra to check out the way in which miniature wargames and even board games use rules to simulate some aspect of reality. It was difficult to follow some of the WWII miniature wargames with the complexities involved but I nevertheless came home with these three rule books to examine at my leisure.


These rule books, and others including the popular Flames of War, seek to represent different conflicts (principally WWII) in terms of geographic location, battle contexts, and military personnel and equipment. Establishing the right combination of personnel and equipment (e.g. number of soldiers and number of tanks) is necessary for each "game". Added complexity comes into play when dealing with levels of experience and resilience to stress in combat situations; psychological aspects that seek to simulate real life situations and add operational interest. Some miniature wargames include aircraft to add another layer of complexity.

The upshot is that these wargames rely on history (and research) for their operational contexts. While not mandatory, having a good understanding of the history enhances the experience of the game. The games also rely on geography and the types of equipment rosters applicable at the time and place. Such characteristics are very similar to those in the model railroad hobby. Also very similar to the model railroading experience is the commercial side of the hobby with various books and magazines, kits, detail parts, hobby tools and accessories, and paints and powders all available at the show.

There are of course some differences between the two hobbies  However, I am more interested in finding out whether aspects of the wargaming experience (e.g. the rules and the "playing") can be applied to enhance the operational enjoyment of model railroads. I need to read more and talk with more wargamers to better understand what they do and how they do it.

That said, I would be interested in hearing from any dual code modellers (wargaming and model railroading) to get their perspective on the operational aspects of both hobbies.

Friday, 23 January 2015

Model railways as a game

Welcome to Armchair Modeller Down Under in 2015.

Last year was a rather quiet year with my time taken up with a number of other activities. I hope this year will allow me some spare time to publish regular posts here and in sister blog, DME Down Under.

One of the themes I want to cover this year is gamification.  Briefly, gamification is the use of game thinking and game mechanics in non-game contexts to engage users in solving problems and increase users' self contributions. In the context of model railways where we seek to draw inspiration from the prototype, I want to investigate some of the thinking around gamification and how other hobbies, such as wargamers, combine elements of gamification with historical or contemporary real life practices. Gamification is also important in other fields such as education and technology development.

In model railways, many of us want to simulate prototype railway operation on our layouts to increase our enjoyment of the hobby and to give a sense of purpose. At the same time, we cannot always exactly replicate the prototype (although there are modellers who aim for such perfection) and therefore compromise prototype operational authenticity to increase modelling potential and other operational practicalities. Gamification is something I am interested in furthering my knowledge about to see if there are elements I can use to increase the enjoyment of my model railway.

And this is one reason why I will be attending Cancon this Australia Day long weekend in Canberra. I will be interested in the different forms of wargaming, in particular the rules and concepts, which underlie the actual playing of the game. As people know, wargaming is often based on an extensive knowledge of historical conflicts with as much enthusiasm and detail as many in the hobby of model railways. There is definitely a connection to history and research that both hobbies share.

In addition, the range of paints and ancillary items for sale at Cancon are of use in both hobbies and are an added bonus. I especially enjoy talking with people about the painting techniques of wargame miniatures which is indeed a very special skill.

So, with this rather offbeat introduction to the year, I hope that you will find this and future blog posts on Armchair Modeller Down Under of continued interest.


Tuesday, 22 May 2012

Time and distance

One of the difficulties model railways have is in dealing with time and distance.

Layouts that want an operational focus will have to come to terms with the fact that the scale distance between towns on the model railroad can in no way approximate the prototype. We already seek to compress towns and yards to fit within our defined model railroad space as best we can. Trying to actually compress real distance between towns is even more difficult due to limitations on model railroad space.

And when the distance between towns is relatively short on our model railroads, the amount of time a train takes between those towns is also relatively short.

For the most part we get by with using fast clocks. Fast clocks seek to reduce "real" time to model time so that we can have some useful timetable operation. It's no good using real time when the time it takes for your train to travel between Town A and Town B is ten seconds! By using a fast clock we can pretend that the train took ten minutes or forty minutes or whatever between towns.

The time factor, even with a fast clock, also faces the problem that it is often the case that as the head of the train arrives at Town B, its tail is just leaving Town A! While the distance between towns will depend on overall layout size, I have operated very large model railroads in the US where this is still a problem.

In essence, if we want to try and replicate time and distance on the model railroad based on the prototype, it is damned hard to do well. This leads to compromise and ingenious proxies (like the fast clock) to help us manage as best we can.

However, I am thinking of an alternative solution. I haven't calculated the exact times to use just yet, so please just stay with me at the conceptual level at this stage!

On my proposed US layout, one option for my layout plan is to have a key junction station as the starting point, a large station and yard in the middle of the layout footprint for interchange, and then continue along the branch to another junction station for the remainder (including modelling a couple of the intermediate towns here).

In this scenario, the first "half" of the layout will be the first station and the middle station with no modelled towns/yards in between. I am therefore skipping 2 intermediate towns from the prototype because I don't have the space and they aren't operationally interesting enough to warrant inclusion on this part of the layout. What this means is that I would have two stations close to each other on the layout but on the prototype they are actually 60 miles (97km) apart. Using a fast clock in this scenario won't really work.

There is a peninsula between the two towns and I want to enclose this curved section in a shadow box. It is not considered part of "the railway". It won't be scenicked and the top of the box will be used by the dispatcher for his paperwork. As such, this curved section on the model railway does not really exist! This section will also need to be long enough (and hidden) to hold a complete train so train length becomes an issue too.

My idea is to hold the train in this "hidden" section while I run a real time/scale time sequence that will represent the time and distance between the two major towns I am modelling on the layout, but representing the 60 real miles apart on the prototype.

The travel of my model train (distance and time) will be represented by four lights, each representing the four towns on this section of the prototype. The first light goes on when the train leaves the first modelled station and yard (the junction - Town A). The train enters the curved shadow box around the peninsula and stops, being now fully enclosed and not visible at either end. A second light now comes on and the first light goes out. The second light indicates that the train has "arrived" at the second (unmodelled) station. After (say) thirty real seconds, the second light goes off and a third light goes on, representing the next unmodelled town. After another thirty seconds, the third light goes out and the fourth light comes on to indicate that the train is now (under power) entering the fourth town which is the mid-town on the layout that is actually modelled. We have now used a proxy for the time and distance between two modelled towns, including the two unmodelled intermediate towns.

I appreciate the fact that we will have the train operator/s waiting for over a real 60 seconds to get his/her train from Town A to Town D. And most of this real time is actually just waiting for some lights to go on and off before moving the train into the next station and yard on the model railroad. I figure that if I had the space and had actually modelled those two small intermediate towns, then the real time factor of the train moving between Town A and Town D would be the same or more. So pretending to run the train through those unmodelled intermediate towns shouldn't be much of a strain.

By holding up the train off-stage between modelled stations (or in the space-time warp I would prefer to call it), I am using a proxy for the time and distance between two towns, some 60 real miles apart on the prototype.

Comments welcome....

Sunday, 24 July 2011

MRNSW yesterday

I drove up to Sydney from Canberra early yesterday morning with a friend to attend the 28th Modelling the Railways of NSW Convention at Loftus.

I went to my five allocated topics:
DCC and sound
How does a steam locomotive work
Traversers
NSW concrete stations
Timetable operation for model railways

I won't give a description for each presentation because much of the information is available from the notes and in a forthcoming DVD of the presentations (the content, rather than video of the actual presentations). Information about the notes and DVD can be found from the MRNSW website when it is next updated. However, from a form available on the day, the notes should be available for $10 and the DVD for $15. I can say that the notes are a lot more informative than they used to be a few years ago.

My general summation of the day was positive. I listened to the presentations with interest and for the most part I was rewarded with useful and informative information. For me, I really came to the convention to hear about DCC, timetable operations, and the traversers. The othere two presentations were also of interest, and I heard from friends on the day that Ray Love and Craig Mackey's presentation on oil-burning locomotives was terrific.

I enjoyed Ray Pilgrim's talk on DCC and sound. I also enjoyed some superb photos and video from his payout, Bylong. Why the current version of the layout hasn't been featured in AMRM is a mystery to me - it's a superb layout and one that I follow regularly on Ray's Bylong website (which you can find in my blog roll). Ray has a preference for Soundtraxx Tsunami decoders and takes great care in trying to match the sound files with the appropriate NSW locomotives. Moreover, the sound is made even more appropriate by the care in which the CV files are set for train speed, acceleration through notch 1 to notch 8, and for braking and momentum control. These features are made easier by the use of a software system called Decoder Pro from JMRI.

The presentation on traversers was also very interesting; albeit Phil Collin's horizontal traverser was very similar to the one I made for my previous layout, Winmar. Phil's traverser was improved though with the use of additional drawer rollers in the intermediate sections of his 8-track fiddle yard. Phil also had fabricated a plexiglass cover to help protect the trains from dust, something I would recommend. The other half of the presentation was from Alan Garbutt on vertical traversers. Alan was inspired by an article in the October 1979 issue of Railroad Model Craftsman where a modeller had made a traverser that ran up and down a wall to store and deliver particular trains to the main line and the layout. Having seen this in operation at Alan's home a couple of years ago on a NMRA monthly meeting, I can vouch for its effectiveness. The bottom line for both the horizontal and vertical traverser is the space saving, and also the cost saving in not having to buy points and point motors for ladder tracks.

Finally, and it was the last presentation for me on the day, was the one about timetable operation from Gary Hughes and Jim Crew. Unfortunately, there was a technical problem that prevented the visual display of the presentation through the projector, but it was nevertheless informative with just the spoken notes. The talk was based on Gary's home layout, the Hartley Railway. Gary gave advice on setting appropriate objectives, layout requirements, personnel, and operating techniques. Similar advice, albeit from US prototype modellers, comes from the US model railroad press (e.g Allen McClelland, Andy Sperandeo, Tony Koester, and others), as well as from the DVD on model train operation from Paul Scoles.

In Australia, Kev Loughhead's Moping Branch has been a local inspiration for model railway operation (Moping Branch is featured in the July 2011 issue of AMRM) as well as Ray Pilgrim's Bylong.

Gary's presentation stressed the need to take the lead from the prototype to work through the elements of timetable operation on the model railway. In this regard, NSW Working Timetables are very useful. Jim Crew gave us information on the use of fast clocks as used on Gary's layout. One nice feature of the custom-built clocks was an option to "rewind" time when unexpected things happened that severely delay operations. If only the prototype railways had this option!

There were a number of commercial outlets at the convention, including Anton's, Bergs, Casula Hobbies, Eureka, Kerroby, Model Railroad Crafstman, Pallas, and SCR Publications. It was good to see some of the outlets selling the latest issue (No.11) of the Australian Journal of Railway Modelling (AJRM).

Ian Black showed how he converted Lima steel-sided passenger cars into authentic looking Southern Aurora cars. Having a table demonstration like Ian's was a nice feature that showcases skills and ideas throughout a day already packed with scheduled formal presentations.

The other feature of the day was the layout on show - Waterfall - from the good-natured chaps from the Illawarra. I really liked being able to get up close to this layout and really spend time looking at the terrific scenic details on this layout. It was also good to have time to chat, something that's not always possible in the hustle and bustle of exhibitions.

While the day for me started around 4.45am and didn't finish until I got home around 10pm, it was nevertheless a great day. There was plenty of informative presentations and some good opportunities to chat with other modellers in the breaks. All in all, it was a great day out.

Tuesday, 18 January 2011

Radio control

A couple of years ago I wrote a letter to AMRM asking why it was that real radio control had not taken off in model railways.

Power and digital command control (DCC) still rely on the track to transmit the energy and digital signal information to move locomotives. To me, the reliance on the track is a real weakness. Why wouldn't it make sense to run locomotives powered by rechargeable batteries and operated by wireless control systems (yes, I know that there is wireless control in DCC but the power and digital signal still relies on the track to convey this information).

We all know that to get a reliable model railway we need to have excellent trackwork. There is an emphasis on wiring the track effectively to transmit power (both DC and DC) and digital signals (DCC) for maximum operational performance. But getting the electrics right and ensuring the track is clean and well wired is often very challenging; and certainly time consuming.

A series of articles in AMRM followed explaining the operation of a Sydney suburban passenger set using battery and radio control. The premise was excellent but I did have some misgivings on the amount of work involved. I understand that Bergs Hobbies might be providing kits for this type of radio control as used in the articles.

The layout design special interest group (a NMRA group based in the US) ran an article about using radio control for model railways a few years back (Layout Design Journal, Issue 37, pages 42-45). I need to track down a copy.

As someone who is almost ready to jump onto the DCC bandwagon, I am wondering how likely and how soon it will be before battery and radio control becomes the standard operating system for model railways. Being able to disassociate control from the track would be a huge boon for the hobby. Such control is already available in model planes and model cars, albeit of a somewhat larger size to HO/OO scale model railways.

And I know how fast technology is moving in model railways. The marketing manager of Hornby in the UK was recently reported (in Railway Modeller, I think) saying that in a couple of years now it may be possible for model locos to emit real prototype engine smells!

Is DCC going to be just an intermediary step between between analogue control and remote controlled battery powered locomotives? I desperately need to know before spending a lot of money going down the DCC path!

Wednesday, 5 May 2010

New Zealand Model Railway Convention - Part 3

The third day of the New Zealand Model Railway Convention in Christchurch was Sunday 4th April. The weather had turned cold and overcast which was a pity since the afternoon activity included a trip to Ferrymead Heritage Park and some 1:1 steam train action. More on that later.

The morning clinics included "Freelance modelling", "Desert scenery", "Image manipulation", and "NZ scenery". I went to the clinic on New Zealand scenery and I was not disappointed. Barry Fitzgerald and John Dudson gave a great presentation on making and displaying some typical New Zealand trees and vegetation. Referring to my notes, I recorded the following dot points:
  • look for particular motifs specific to the location you're modelling - helps to identify the location and give credibility to the scene - but motifs need to complement each other
  • look for typical scenery and the familiarity of everyday life
  • study the local architecture and apply to your modelling
  • "detail is not overcrowding"
  • provide for lineside interest (e.g. cameo scenes)
In particular, the presentation demonstrated the making of New Zealand cabbage trees using the paper star method (a method that seemed to be recognised by my New Zealand compatriots but not by me!). The technique goes something like this:
  • use paper or thin cardboard (the suggested paper thickness was 80-85 gsm) to cut out a round-shaped disc of a size suitable for your cabbage tree foliage in your scale (S scale in this example)
  • divide into quadrants in order to ensure even cuts around the disc to create "leaves"
  • use scissors for the cutting (be careful not to cut through the centre or you won't have a disc anymore, but only part of a disc)
  • put a pin through the centre (hence the "paper star" look)
  • fold the "leaves" back and repeat process with more discs to build up layers of foliage until you have sufficient for your tree head
  • you can add a lower fringe of grey paper "leaves" to represent dead or dried fronds
  • select a suitable twig for the trunk and secure the "paper stars" head using PVA glue
  • add additional fronds with green paper to the top using the same paper star method
  • tease out the "leaves" or fronds to match the shape of the real-life cabbage trees
  • paint paper stars shades of green or brown or yellow as appropriate
  • add cabbage trees together in clumps on your layout
More scenery tips:
  • build scenery on the layout from the ground up
  • look for colour, texture, and variety (e.g. at every step you have a colour option)
  • static grass is a good scenery method but use different shades of scenery flock
  • important to blend colours to overcome the "same look" (a suggestion was to make up a colour chart of colour shades, particularly in the green and brown colour ranges)
  • use rock moulds for modelling rock outcrops but pay attention to colour shades (recommend using Woodland Scenics colour range of paints)
  • for concrete, "Tradeset 45" plaster recommended (sets in 45 minutes)
There was also a demonstration of making a conifer using a suitable stick and "sea foam".

The second session of clinics on Sunday morning included "Track matters" with Iain Rice, "Modelling in the garden", Adapting RTR locos", and "Operation NZ style". I attended this latter clinic on model railway layout operation by Trevor James. Trevor based his talk on his own S scale NZR prototype layout, currently under the moniker of "My layout"! Trevor introduced his (absolutely beautiful) layout with a track plan and photos, based on a fictional railway line between Auckland and Wellington (on the North Island). The track plan looks like a figure eight in the middle of a surrounding single main line and featuring two big towns (Waimarino and Tipapa Junction) and end points (Auckland and Wellington) as off-scene staging.

Trevor explained how he applied the common US model railway operation method of cards and waybills. The planning process and use of an operating system went something like this:
  • a point-to-point layout with two main intermediate towns towns, a couple of smaller settlements, and off-scene staging at both ends representing Auckland and Wellington
  • a "wish list" determined key features on the layout (e.g. a wharf scene, bridges, farming, a swamp, industries, etc.)
  • it was also important to give the layout a reason-for-being (e.g. traffic generation)
  • establish appropriate industries and position on the layout
  • design a timetable for trains on the layout ( time a locomotive as it runs around the layout and get times between stations; then using a train in each direction, build up a sequence of trains and times)
  • establish type of train (express goods, etc.) and position in the timetable
  • trial and error will help set an acceptable timetable from which to work from
  • further detail can be added to include instructions on what to do at particular locations throughout the layout, taking into account other trains that might also be around (this layout operates one train in each direction with single line running)
  • draw up work orders for each train, based on the type of wagons you have, the industries to serve, and the timetable
  • from what I recall, the information was initially put into Microsoft Excel
  • later, Trevor experimented with a computerised car card system called ShipIt
  • ShipIt requires lists of rolling stock, locomotives, guards vans, trains, towns, shippers, products, consignees, etc.
  • inputing all the necessary information into ShipIt was tedious and repetitive but Trevor said he would persevere!
  • the conclusion of the talk was that creating a focus on operation was a realistic and enjoyable way to run trains on his layout
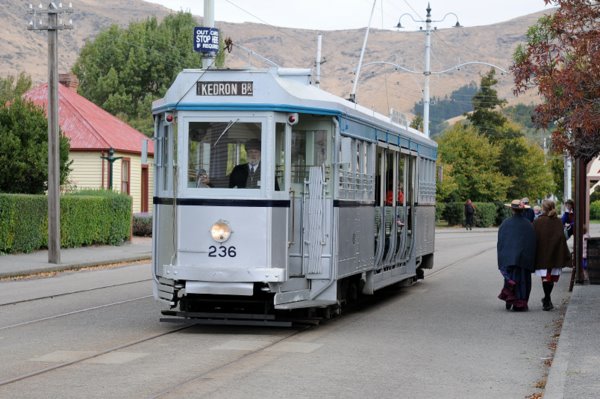
After lunch, there was another afternoon of layout tours to enjoy. The layouts I visited were in the New Brighton area of Christchurch and included British N and OO gauge, US N and G scale, S and O scale NZR, and a huge HO/OO/S layout that had examples of pretty much all the major model train prototypes from across the world! Afterwards, we had time to visit Ferrymead Heritage Park. I have included some pictures from Ferrymead below, including the two steam locomotives in operation on the day


The last photo shows my NZ compatriots (the three chaps at the back) with whom I enjoyed a pleasant Sunday afternoon visiting home layouts and the wonderful Ferrymead Heritage Park. Thank you, one and all.

Wednesday, 11 November 2009

Railway operation is for me

Last night I went over to Rob's place for the monthly operating session on his VR/NSWR layout. The layout uses DCC for loco control and a card operating system based on train sequences.

The experience of operating this layout has reinforced to me that I really love model railway layouts that feature a system of "prototype" operation. Now, this layout wasn't run exactly as on the prototype because it represents a railway line between towns in Victoria and the southeast coast of NSW where no real prototype line existed. But that's not the point: the layout is run as an approximation of prototype railroading with an emphasis on establishing a real purpose for the movement of particular trains and the locations on the line. This blend of operation and railway purpose is what is of greatest interest to me. It also helps to have a good bunch of people to be with during the operating session and Rob's "crew" certainly fits that category.

I am now more seriously considering that when the move to the new home takes place in a couple of weeks time, the "old" layout (Winmar) will get dismantled. I need to build a new layout based on my model railway operation-oriented preferences. My thinking at this stage favours a shelf type of layout. The design of the layout will be planned specifically for the actual size and shape of the available space in the garage of the new house. I shouldn't need to compromise the new layout because of a previously designed and built layout from many years ago; one that was constructed within the parameters of a different overall plan and housed in a different location in Sydney.

The development of Winmar did offer some operational potential with the proposed Lake Hume branch and the industrial siding leading off to the traverser (fiddle yard). However, in the new location in Canberra, a single-top baseboard that is 16' x 8' in size does not really fit conveniently within the space available, and nor does it really offer an easy path for any potential Lake Hume Branch extension in the future.

The stage is therefore set for a new layout design that reflects my current thinking and preferences. The layout will be designed specifically for the new physical space of the garage at the house we move to at the end of the month. I think we have a new beginning...

Monday, 14 September 2009

Looking forward to Adelaide this weekend

I am looking forward to going to Adelaide this coming weekend. I will be attending the Modelling the Railways of South Australia Convention being held on Saturday at the Flinders Medical Centre.

I have been to several of these Conventions in Adelaide over the years and I have always enjoyed them immensely. The Modelling the Railways of South Australia Convention is full of information. There are presentations and a set of high quality notes that are produced each year. The notes are really a set of quality articles that support the presentations and form part of a reference library from previous Conventions. The notes are organised by subject headings and form individual inserts into ring binders. The articles are fully indexed and the current index of notes is now very comprehensive. I cannot recommend the Convention notes highly enough!

In addition, the Convention has a model display where models of locos, rollingstock, and buildings are showcased. In some years, a display layout is also exhibited.

The Convention last year featured a display layout and a diorama; both HOn3.5 and of excellent quality. In the first photo below you can see the display layout with Commonwealth Railways NM25 hauling a mixed goods train on the bridge over Wirreanda Creek. The actual prototype NM25 is preserved by the Pichi Richi Railway in Quorn, South Australia.


The next photo shows the diorama built by the Northern Modellers Group. The diorama featured some really terrific buildings. One of the builders of the diorama, Des McAuliffe (thanks for the correction, Iain), also gave an excellent presentation on model railway operations, illustrating his talk with video from his HO scale South Australian-prototype home layout.


The last photo here shows the Criterion Hotel, a typical South Australian-looking pub. The model is in HO scale and is built from card. Interestingly, many of the buildings on display at the 2008 Convention and previous conventions have featured buildings made from card.


I am certainly looking forward to what I will hear and see at the 2009 Convention this Saturday. A report will follow upon my return home.

Tuesday, 8 September 2009

Model railway operation using staff control

I had an enjoyable operating session last night at the home of one of the local members of the Australasian Division of the NMRA. The layout is a fictional railway line located between North Geelong in Victoria and Eden on the far south coast of NSW. As a consequence, the line is standard gauge. The locos and rollingstock come from both the Victorian and NSW railways, as well as Freight Australia, Great Northern, R&H, and National Rail.

The layout is controlled using an older version of Easy DCC and works to a train order sequence. A card for each train gives instructions as to the origin and destination, and any operational requirements en route. For example, one of my trains last night was a goods train that had instructions to pick up and set out wagons at various locations along the way. Shunting in a number of yards and keeping to sequence was indeed quite a challenge, especially if through trains were waiting on me clearing the main to allow them uninterrupted passage.

There were about nine of us working these trains, including what the Americans would call yardmasters at the terminus points (North Geelong and Eden) and at the key crossing point (Latrobe Valley) midway between the two.

Operation was an interesting combination of radio control and staff exchange. This meant that one couldn't enter a new section of the railroad without permission (obtained through using the individual radio control handsets and microphones) and without getting the staff for that section. Upon leaving the section, the staff had to be returned. The photo below shows the staffs for the five key sections of the layout. You can see that there are two trains in operation by the fact that the staff for section B and section D are not in the box.

You can also see in the photo how the staffs are stored in a vertical position. The staffs sit in the box and actually operate a switch at the base of the wooden holders to indicate when a staff is in position in the wooden box or has been removed. The staff set-up also controls the signals to give the correct colour light signal for approaching trains. Very ingenious indeed!

I really enjoyed the operating night and using another type of digital control system. I am becoming more interested in using digital control every time I have the chance to experience a real operational model railroad, rather than simple loop layouts that are popular at model railway exhibitions. Operating a Victorian/NSW layout was also an interesting experience. It was certainly nice to see all those Austrains, Auscision and Trainorama locos and wagons in use.

Thanks to Rob and the other chaps for a really great evening!

Tuesday, 14 July 2009

Notes on a layout - Winmar

I was searching through a bundle of papers in the study over the weekend and found my notebook about my Australian layout, Winmar. It was interesting reading to go back a few years and see how some of the ideas formed about the layout. Here are some tidbits from those notes:
  • the layout was named after former St Kilda AFL player, Nicky Winmar
  • the layout design was influenced by the prototype track configuration at Culcairn and Blayney, both towns in New South Wales, but on different lines.
  • I liked the Main South Line for the types of trains I could run (express passenger and varied freight). I also liked the added operational interest generated by using a fictitious pioneer branch (inspired by a Lloyd Holmes article on Culcairn in one of the Byways of Steam books), and just like the lines to Oaklands, Kywong, Westby, and Holbrook.
  • the layout baseboard had initially been built by my dad in the late 1970's using a 12 inch grid framed at the perimeter by aluminium lengths for rigidity. The baseboard is 16' x 8' with an operating well in the middle. I put a series of formers on the layout to raise the actual baseboard height above the grid so I could fit point motors and dip the scenery. The baseboard is now extremely heavy but after several moves, remains intact.
  • the 8' long traverser that acts as a fiddle yard first used drawer rollers. These were not strong enough so I decided to use heavier steel rollers used to hold shelves of computer servers. This has been much better, although I intend to put in another roller in the middle to prevent some slight sagging.
  • I had initially used a diamond crossing to get from the inner siding to a factory but was later informed that diamond crossings were very rare on the NSWR. I changed that to an 'S' bend from the inner siding to the factory/flour mill/biscuit factory (still undecided on that one) used 24" radius curved Shinohara track. This has since been replaced by 30" curved Shinohara track, requiring an insert in one corner of the operating well to hold the track and the to-be-constructed industry.
  • a mixture of Peco and Seep point motors were used. The Seep motors seem a more simple yet just as effective mode of turnout operation.
  • single track running is fine for home layouts
  • the junction behind the station to the left (but at the front of the viewing area) at Winmar offers potential for future extension and the Lake Hume branch is gradually finding some "prototype history" to explain its existence.
  • the Lake Hume branch could be used to bring coal to the power station and agricultural supplies to farmers, and ship out timber, livestock and grain. I made a subsequent note that perhaps a mineral sands industry (like Bemax) might be possible.
There were a few more bits and pieces of information in the notebook. However, much of what was important in the early planning and construction days were formed from the thinking recorded in the notebook and mentioned in point form here. Perhaps if I had started a blog back then, there would have been even more revealed and remembered.

Now, if I could find some of the digital photos that either Bob or I have taken of the layout to actually illustrate these notes I'd be very happy!

Tuesday, 26 May 2009

Blogger layouts I follow

One of the interesting dimensions of blogging using Blogger is the connections with other Blogger bloggers of similar interests - in ths case, railway modellers. I realise that this is the community or social media aspect to the Blogger product. It is not as sophisticated as Vox nor as ubiquitous as Wordpress. But it still performs a connecting function to like-minded souls that I think I will like. But I digress.

I have decided to initially connect to two layouts featured on Blogger/Blogspot. They are South Coast Rail (SCR) and Bylong.

I have visited South Coast Rail many times and really admire the way in which the layout's operational and design elements have come together. Partly this is due to the track plan, and partly because of the thinking behind the layout's reason-for-being. I often invited myself over just to see the progress on the layout and see some new building or scenery under construction.

The second connection I have made is to Ray Pilgrim's Bylong. I first saw Bylong at the Sydney Model Railway Exhibition in the late 1970s. I recall a NSWGR 26 class saddle tank in action at the time. I was impressed back then by the layout and equally impressed when I read about the layout in an issue of AMRM. I would love to see another article in AMRM about Bylong, especially the emphasis on operations.

Since that time I have followed the progress of Bylong via third parties and the odd conversation at a Petersham Convention or model rail exhibition. I doubt that Ray would know me, although I know a little about Ray and his rock n' roll!

The common feature of both layouts are quality production and operations - and they are the critical points of interest for me too.