In my role of armchair modeller, I tend to spend quite a bit of time reading model railway magazines and blogs on model railway topics. They all pretty much give an opinion or two on some aspect of the hobby or on life in general. For example, you can see some of the blog sites in my blog roll that I will often refer to, even if the updates are as slow as my own! What amazes me, however, is how worked up some people can be in their derision of people's modelling preferences and their modelling efforts, and in some cases, the person as well. Model railroading is supposed to be fun, is it not?
Recently, I was going through the blog of US modeller Lance Mindheim. Lance had his layout featured in the December 2013 issue of Model Railroader. The layout is a great example of taking inspiration from the prototype (Miami, Florida, in this case) and building a really nice model railroad. The composition and scenic elements of the layout are superb. There really should be no doubt that Lance is darn good modeller with a quality model railroad. And, as an aside, I hear Lance is to be a guest speaker next Easter at the New Zealand Model Railway Convention in Hamilton, New Zealand (home of the Chiefs rugby union team).
In Lance's blog entry for 30th November 2013, entitled "Live by the sword, die by the sword", Lance has compiled a number of derogatory comments from a UK forum about his layout and his layout article in Model Railroader. It seems that there are some people who don't like the dimensions of Lance's layouts. Building layouts using a standard 6' by 1' baseboard size irks some people. Other comments are critical of Lance's views about model railroading, particularly his expression about "modelling the ordinary". One US commentator didn't like the fact that an image of Lance's layout in Model Railroader had been digitally enhanced with the addition of a photo backdrop instead of showing the basement plumbing!
Lance shrugs off these comments and so he should. Lance is a very good modeller; one who thinks seriously about his modelling while at the same time enjoying the hobby as well. One of the greatest ironies from the criticisms is the fact that the UK model railroad magazines regularly feature micro-layouts which gives pause for thought for those who don't like shunty-plank designs!
The other interesting observation from these criticisms is the comment about Lance's personal views that he expresses sometimes in his model railroad blog and in his other blogs. Personally, I don't know why this is a problem when millions of bloggers around the world are just airing their opinion on pretty much everything. Blogs, by their very nature, are opinion pieces. I could go on, but I don't want to offend anyone with a lecture on the impact of social media on contemporary society...
Whatever ones opinion and whatever the way one chooses to express it, the model railway hobby includes people with umpteen different views on everything from layout planning to scenic detail and operational preferences. Note that I am talking about opinion, not fact. HO scale is 3.5mm to the foot - that's a fact without too much argument. Opinions about a layout in HO scale is another matter. The variety in what modellers do in HO scale (and other scales) is enormous and something we should cherish no matter what our own selective interests may be.
Variety and newness can help instigate our own thinking, whether it emanates from some feature we dislike on a layout or something we find fresh and appealing. Sometimes something that didn't interest us last year is now of immense importance as it now coincides with some modelling work we are doing now, rather than previously when we had just a passing interest. Newness can thus mean relevance at a certain point in time.
People are in the hobby for a range of different reasons and with a range of different skill sets. Individual preferences will abound but we are all part of our common hobby. Like humanity itself, essentially we are all the same. Where we differ in our preferences and approaches in doing things, we should take the opportunity to enhance our knowledge rather than simply deride those who take a different path to our own. It would be a boring hobby and a boring Australia if it were any other way.
That said, may you all have a safe and enjoyable festive season and New Year.
Showing posts with label NZMRC. Show all posts
Showing posts with label NZMRC. Show all posts
Friday, 13 December 2013

Thursday, 6 May 2010
New Zealand Model Railway Convention - addendum
I want to finish off my description of the New Zealand Model Railway Convention by thanking the organisers of the event and the individuals who gave presentations and clinics. I also want to thank the people who displayed their layouts in the hall at the Convention and the people who displayed their home layouts on the layout tours. Finally, I want to say that I thoroughly enjoyed the conversations and hospitality of all the people I met and chatted to at the Convention.
The Convention was a great success, but there was more. Whilst there were no official layout tours on Monday 5th April, since the Convention was over, some local modellers gave times for an open house during the day.
I was exceedingly lucky to get to the home of Peter Ross, with barely a minute to spare, on my way home late in the afternoon from a day trip to Akaroa. Peter's layout, Amberley, is an S scale (1:64) work-in-progress based on the line between Amberley and Waipara, not too far north of Christchurch, and set in the 1950s. Peter was kind enough to invite me in and spend time talking with me about the layout well past the open house closing time. Thank you Peter - and what a superb layout!


Until next time....
The Convention was a great success, but there was more. Whilst there were no official layout tours on Monday 5th April, since the Convention was over, some local modellers gave times for an open house during the day.
I was exceedingly lucky to get to the home of Peter Ross, with barely a minute to spare, on my way home late in the afternoon from a day trip to Akaroa. Peter's layout, Amberley, is an S scale (1:64) work-in-progress based on the line between Amberley and Waipara, not too far north of Christchurch, and set in the 1950s. Peter was kind enough to invite me in and spend time talking with me about the layout well past the open house closing time. Thank you Peter - and what a superb layout!


Until next time....
Wednesday, 5 May 2010
New Zealand Model Railway Convention - Part 3
The third day of the New Zealand Model Railway Convention in Christchurch was Sunday 4th April. The weather had turned cold and overcast which was a pity since the afternoon activity included a trip to Ferrymead Heritage Park and some 1:1 steam train action. More on that later.
The morning clinics included "Freelance modelling", "Desert scenery", "Image manipulation", and "NZ scenery". I went to the clinic on New Zealand scenery and I was not disappointed. Barry Fitzgerald and John Dudson gave a great presentation on making and displaying some typical New Zealand trees and vegetation. Referring to my notes, I recorded the following dot points:
The second session of clinics on Sunday morning included "Track matters" with Iain Rice, "Modelling in the garden", Adapting RTR locos", and "Operation NZ style". I attended this latter clinic on model railway layout operation by Trevor James. Trevor based his talk on his own S scale NZR prototype layout, currently under the moniker of "My layout"! Trevor introduced his (absolutely beautiful) layout with a track plan and photos, based on a fictional railway line between Auckland and Wellington (on the North Island). The track plan looks like a figure eight in the middle of a surrounding single main line and featuring two big towns (Waimarino and Tipapa Junction) and end points (Auckland and Wellington) as off-scene staging.
Trevor explained how he applied the common US model railway operation method of cards and waybills. The planning process and use of an operating system went something like this:


The last photo shows my NZ compatriots (the three chaps at the back) with whom I enjoyed a pleasant Sunday afternoon visiting home layouts and the wonderful Ferrymead Heritage Park. Thank you, one and all.
The morning clinics included "Freelance modelling", "Desert scenery", "Image manipulation", and "NZ scenery". I went to the clinic on New Zealand scenery and I was not disappointed. Barry Fitzgerald and John Dudson gave a great presentation on making and displaying some typical New Zealand trees and vegetation. Referring to my notes, I recorded the following dot points:
- look for particular motifs specific to the location you're modelling - helps to identify the location and give credibility to the scene - but motifs need to complement each other
- look for typical scenery and the familiarity of everyday life
- study the local architecture and apply to your modelling
- "detail is not overcrowding"
- provide for lineside interest (e.g. cameo scenes)
- use paper or thin cardboard (the suggested paper thickness was 80-85 gsm) to cut out a round-shaped disc of a size suitable for your cabbage tree foliage in your scale (S scale in this example)
- divide into quadrants in order to ensure even cuts around the disc to create "leaves"
- use scissors for the cutting (be careful not to cut through the centre or you won't have a disc anymore, but only part of a disc)
- put a pin through the centre (hence the "paper star" look)
- fold the "leaves" back and repeat process with more discs to build up layers of foliage until you have sufficient for your tree head
- you can add a lower fringe of grey paper "leaves" to represent dead or dried fronds
- select a suitable twig for the trunk and secure the "paper stars" head using PVA glue
- add additional fronds with green paper to the top using the same paper star method
- tease out the "leaves" or fronds to match the shape of the real-life cabbage trees
- paint paper stars shades of green or brown or yellow as appropriate
- add cabbage trees together in clumps on your layout
- build scenery on the layout from the ground up
- look for colour, texture, and variety (e.g. at every step you have a colour option)
- static grass is a good scenery method but use different shades of scenery flock
- important to blend colours to overcome the "same look" (a suggestion was to make up a colour chart of colour shades, particularly in the green and brown colour ranges)
- use rock moulds for modelling rock outcrops but pay attention to colour shades (recommend using Woodland Scenics colour range of paints)
- for concrete, "Tradeset 45" plaster recommended (sets in 45 minutes)
The second session of clinics on Sunday morning included "Track matters" with Iain Rice, "Modelling in the garden", Adapting RTR locos", and "Operation NZ style". I attended this latter clinic on model railway layout operation by Trevor James. Trevor based his talk on his own S scale NZR prototype layout, currently under the moniker of "My layout"! Trevor introduced his (absolutely beautiful) layout with a track plan and photos, based on a fictional railway line between Auckland and Wellington (on the North Island). The track plan looks like a figure eight in the middle of a surrounding single main line and featuring two big towns (Waimarino and Tipapa Junction) and end points (Auckland and Wellington) as off-scene staging.
Trevor explained how he applied the common US model railway operation method of cards and waybills. The planning process and use of an operating system went something like this:
- a point-to-point layout with two main intermediate towns towns, a couple of smaller settlements, and off-scene staging at both ends representing Auckland and Wellington
- a "wish list" determined key features on the layout (e.g. a wharf scene, bridges, farming, a swamp, industries, etc.)
- it was also important to give the layout a reason-for-being (e.g. traffic generation)
- establish appropriate industries and position on the layout
- design a timetable for trains on the layout ( time a locomotive as it runs around the layout and get times between stations; then using a train in each direction, build up a sequence of trains and times)
- establish type of train (express goods, etc.) and position in the timetable
- trial and error will help set an acceptable timetable from which to work from
- further detail can be added to include instructions on what to do at particular locations throughout the layout, taking into account other trains that might also be around (this layout operates one train in each direction with single line running)
- draw up work orders for each train, based on the type of wagons you have, the industries to serve, and the timetable
- from what I recall, the information was initially put into Microsoft Excel
- later, Trevor experimented with a computerised car card system called ShipIt
- ShipIt requires lists of rolling stock, locomotives, guards vans, trains, towns, shippers, products, consignees, etc.
- inputing all the necessary information into ShipIt was tedious and repetitive but Trevor said he would persevere!
- the conclusion of the talk was that creating a focus on operation was a realistic and enjoyable way to run trains on his layout


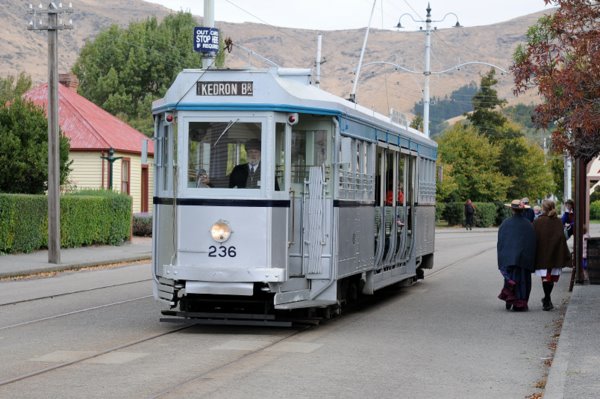


The last photo shows my NZ compatriots (the three chaps at the back) with whom I enjoyed a pleasant Sunday afternoon visiting home layouts and the wonderful Ferrymead Heritage Park. Thank you, one and all.
Tuesday, 4 May 2010
New Zealand Model Railway Convention - Part 2
Well, I'd better catch up with my report of the New Zealand Model Railway Convention from Christchurch at Easter (a few weeks ago now).
Day 2 was on Saturday 3rd April. The morning started with a number of concurrent clinics. The clinics included "modelling with CAD" and "NZ scenery". I went to the clinic on layout design by Iain Rice. This presentation followed on from Iain's presentation the previous day. I made some notes during the session in my usual dot point format which I will use here.
Layout design:
The main learning point for me was to look for daylight fluorescent tubes rated at 4200-4800K. Fluorescent tubes still offer better quality lighting for the money than alternatives (such as halogen or LEDs for room and layout lighting). Interestingly, Iain Rice recommended "cool white" lights at 4200K as well.
The second half of the day was spent on a layout tour. I saw layouts at five different homes in the north Christchurch area. The five layouts included three English, three US, and one NZR 1:64 (S scale) layout. And if you can add up, let me explain that a couple of the homes had more than one layout! Scales represented included N, HO, OO, S, and G scale garden railroading.
I really appreciated the time the layout owners gave to host the tour, provide information and respond to questions, and for their obvious delight in running trains! And thanks to our driver who took four of us around in his car. The afternoon was very enjoyable indeed.
The next blog posting will have Day 3 and some photos...stay tuned!
Day 2 was on Saturday 3rd April. The morning started with a number of concurrent clinics. The clinics included "modelling with CAD" and "NZ scenery". I went to the clinic on layout design by Iain Rice. This presentation followed on from Iain's presentation the previous day. I made some notes during the session in my usual dot point format which I will use here.
Layout design:
- design for realism and visual effect
- take a natural viewpoint (the way the layout will be viewed compared to how we view the prototype - the two are not the same)
- design with consistency when it comes to standards and quality (without a consistent display, variation to standards and quality become obvious and detract from the display)
- accurate observation of the prototype and layout are critical, especially vegetation
- use natural colours - colour intensity recedes with distance; restrained colours more appropriate than stark, bright colours; requires superb observation and translation to model; and backdrops are important to finish off scenes
- Need to look at the combined relationship between layout height, viewpoint & backscene
- Need to pin down the horizon. In real life, the horizon is the eye level to the edge of the visible earth. Therefore, we need to account for the horizon on our model the same way, paying attention to the position of the skyline above (hills) or below (valleys) the horizon.
- cut out distractions and focus attention on the layout
- give the impression of distance and depth to a layout
- establishes the horizon (viewing perspective)
- contains the scene
- complements the model display
- layout lighting enhances the way a layout is observed by the viewer
- lighting affects the way colour on the layout is perceived (i.e. prototype v. model colours)
- light at back of scene to kill off shadows from light at the front of the display
- need for the right balance between the position of vertical and horizontal scenic elements
- needs to be visually appealing
- suggests the use of view blocks to focus a viewer's attention in order to showcase a particular scene or to "discourage" the close examination of a scene or scenic element. Thus, view blocks can direct a view or block a view.
- the span of vision for humans is 3' (36 inches) for a view 4' 6" (54 inches) wide - that's what my notes say!
- visual compression - not always possible to reduce a scenic element (e.g. a building) to an exact scale reduction because the object is often too large for the available space. Or it may not look right on the layout, irrespective of what the 1:1 scale might suggest. In these situations, try compressing the object proportionately by 80-90% and then make to scale (i.e. reduce the proportion of the actual object to be scaled for modelling purposes).
- perspective sketching is helpful (and Iain is quite skilled in this type of art)
- a "planning model" may help visualise your plan. The idea would be to do mock-ups, either in the same scale as your layout or smaller to check positioning and whether it looks right
- establish visual balance for enhanced composition
The main learning point for me was to look for daylight fluorescent tubes rated at 4200-4800K. Fluorescent tubes still offer better quality lighting for the money than alternatives (such as halogen or LEDs for room and layout lighting). Interestingly, Iain Rice recommended "cool white" lights at 4200K as well.
The second half of the day was spent on a layout tour. I saw layouts at five different homes in the north Christchurch area. The five layouts included three English, three US, and one NZR 1:64 (S scale) layout. And if you can add up, let me explain that a couple of the homes had more than one layout! Scales represented included N, HO, OO, S, and G scale garden railroading.
I really appreciated the time the layout owners gave to host the tour, provide information and respond to questions, and for their obvious delight in running trains! And thanks to our driver who took four of us around in his car. The afternoon was very enjoyable indeed.
The next blog posting will have Day 3 and some photos...stay tuned!
Monday, 19 April 2010
New Zealand Model Railway Convention - Part 1
A couple of weeks ago over the Easter weekend, I attended the New Zealand Model Railway Convention in Christchurch. The convention was held at St Andrews College not far from the centre of town. The international guest speaker was Iain Rice from the UK.
Iain was certainly well used by the convention organisers. He spoke on all three days of the convention and visited many home layouts open for layout tours over the weekend. On the first day of the convention (Friday 2nd April), Iain spoke for almost two hours (with a short intermission) about his experiences with model railway layouts over the past 50-odd years (wow, is it really that long?). Iain's presentation was accompanied by some great layout photos from most of his layouts over that time and shown as Powerpoint slides. But this was certainly NOT death by Powerpoint - the images illustrated what Iain had to say perfectly.
Iain started off by telling us about some of his early layouts (e.g. East Suffolk Light, Tregarrick, Woolverstone, and Leintwardine which was built for the Model Railway Journal Show in 1991). Of particular interest to me was the thinking behind each of his layouts, and why some things worked and some things didn't. Iain also enjoyed describing the pros and cons of building white metal locomotive kits from a range of manufacturers in the UK; some harder to put together than others! The upshot is that experience is indeed a good teacher.
One of Iain's more recent model railway layouts is the diorama-like Trerice that depicts the china clay industry in North Cornwall. The layout, in P4, was initially only 6' 7'' long. Iain has since redone parts of the layout to increase operational interest. Trerice is "based on the same convenient fiction that spawned Tregarrick - a mixture of Bodmin and Wadebridge and Cornwall Minerals with a touch of North Devon and Cornwall Junction thrown in". I really liked the way Iain fictionalised a believable history on which to base his model railway; yet selecting practical and personally preferred aspects for the model that he wanted to bring to the layout. The blending of history and fiction for constructing context around a model railway layout seemed to have come naturally to Iain (perhaps a reflection of his theatrical side) which is rather a nice compromise really.
Iain also explained how he displays his exhibition layouts at model railway shows. To get a layout up to eye level for adults (about 58-odd inches if I remember correctly), he stands his layout on a portable table! All in all, it was a very informative and entertaining session.
On the Friday I also went to a presentation on weathering by Stan Agar and a workshop session with a number of demonstrations (the three from five offerings I went to were figure painting, custom decals, and building turnouts). The key message from the presentation on weathering was to refer to the prototype for good examples from which to copy or take ideas from. Stan uses a rather high 40psi for airbrushing, but also favours hand painting a mix of paint and powders for a good "grunge" look and feel. Humbrol enamel paint No.29 was recommended for washes, as was alkyld paint for relatively fast drying (2 days) applications.
The afternoon session concluded with a presentation of digital "slides" of Eric Brooman's famous Utah Belt model railway. The take-home from that presentation included the following:
1) avoid clutter and too many structures on the layout
2) produce typical scenery rather than unique (more believable)
3) staging is paramount
4) design for prototype operation
5) narrow shelves are effective with good backdrops to give depth of field
And in between the sessions there was time to chat and look at the layouts on display in the main hall. The people at the convention were exceptionally friendly and helpful - thank you, I really appreciated it.
I have included a couple of layout photos to whet your appetite for the next (belated) instalment.
The first three photos are taken of the large modular TALMR layout (NZR, 1:64 scale). David Low would certainly be happy with the buildings on this layout - superb stuff!


The next two photos are from the S scale (1:64) NZR layout, Arauatu.


Finally, there was a model competition at the convention. My favourite was this diorama of a New Zealand factory scene built by Mark Dalrymple.

Iain was certainly well used by the convention organisers. He spoke on all three days of the convention and visited many home layouts open for layout tours over the weekend. On the first day of the convention (Friday 2nd April), Iain spoke for almost two hours (with a short intermission) about his experiences with model railway layouts over the past 50-odd years (wow, is it really that long?). Iain's presentation was accompanied by some great layout photos from most of his layouts over that time and shown as Powerpoint slides. But this was certainly NOT death by Powerpoint - the images illustrated what Iain had to say perfectly.
Iain started off by telling us about some of his early layouts (e.g. East Suffolk Light, Tregarrick, Woolverstone, and Leintwardine which was built for the Model Railway Journal Show in 1991). Of particular interest to me was the thinking behind each of his layouts, and why some things worked and some things didn't. Iain also enjoyed describing the pros and cons of building white metal locomotive kits from a range of manufacturers in the UK; some harder to put together than others! The upshot is that experience is indeed a good teacher.
One of Iain's more recent model railway layouts is the diorama-like Trerice that depicts the china clay industry in North Cornwall. The layout, in P4, was initially only 6' 7'' long. Iain has since redone parts of the layout to increase operational interest. Trerice is "based on the same convenient fiction that spawned Tregarrick - a mixture of Bodmin and Wadebridge and Cornwall Minerals with a touch of North Devon and Cornwall Junction thrown in". I really liked the way Iain fictionalised a believable history on which to base his model railway; yet selecting practical and personally preferred aspects for the model that he wanted to bring to the layout. The blending of history and fiction for constructing context around a model railway layout seemed to have come naturally to Iain (perhaps a reflection of his theatrical side) which is rather a nice compromise really.
Iain also explained how he displays his exhibition layouts at model railway shows. To get a layout up to eye level for adults (about 58-odd inches if I remember correctly), he stands his layout on a portable table! All in all, it was a very informative and entertaining session.
On the Friday I also went to a presentation on weathering by Stan Agar and a workshop session with a number of demonstrations (the three from five offerings I went to were figure painting, custom decals, and building turnouts). The key message from the presentation on weathering was to refer to the prototype for good examples from which to copy or take ideas from. Stan uses a rather high 40psi for airbrushing, but also favours hand painting a mix of paint and powders for a good "grunge" look and feel. Humbrol enamel paint No.29 was recommended for washes, as was alkyld paint for relatively fast drying (2 days) applications.
The afternoon session concluded with a presentation of digital "slides" of Eric Brooman's famous Utah Belt model railway. The take-home from that presentation included the following:
1) avoid clutter and too many structures on the layout
2) produce typical scenery rather than unique (more believable)
3) staging is paramount
4) design for prototype operation
5) narrow shelves are effective with good backdrops to give depth of field
And in between the sessions there was time to chat and look at the layouts on display in the main hall. The people at the convention were exceptionally friendly and helpful - thank you, I really appreciated it.
I have included a couple of layout photos to whet your appetite for the next (belated) instalment.
The first three photos are taken of the large modular TALMR layout (NZR, 1:64 scale). David Low would certainly be happy with the buildings on this layout - superb stuff!


The next two photos are from the S scale (1:64) NZR layout, Arauatu.


Finally, there was a model competition at the convention. My favourite was this diorama of a New Zealand factory scene built by Mark Dalrymple.

Subscribe to:
Posts (Atom)