Showing posts with label Photos. Show all posts

Monday, 8 November 2010

Photos from the Wagga Wagga MRE

As I said in my post last night, there were several layouts of interest on show at the Wagga Wagga Model Railway and Hobby Exhibition over the weekend. I have managed to upload some photos this morning into Blogger and here is a sample of the layouts from the exhibition.

The first four images are of the Tumut/Gilmore layout.


The above photo shows the view looking across Gilmore station. And the shot below shows a 49 class shunting the goods shed siding at Gilmore.


The next two photos are of Tumut. The first photo shows a CPH railmotor easing into Tumut station. The second photo shows the yard with one siding curving off sharply to service some industries along the roadside.


The next photo is of Eskbank station on the circa. 1899 Eskbank layout. The station building is quite a work of art.


The next photo shows the G scale layout, Leonville Junction.


A layout still under construction is the Boorawa part of the Galong/Boorawa layout. In this photo a mixed goods is departing the yard at Boorawa.

And lastly, from the Brisbane Water layout, we have a 10 class steam loco with crane picking up coal from the S wagon. This little loco buzzes back and forth throughout exhibitions and must have done hundreds of scale miles by now given the number of exhibitions this layout has appeared at over the years. Nevertheless, there is always something of interest to see on this Brisbane Water layout, a testament to the quality of the layout through all these years.


And that's it folks!

Sunday, 17 October 2010

Bungendore Model Railway Exhibition 2010

This afternoon I made the drive for a quick visit to the Bungendore Model Railway Exhibition. Bungendore is about 40km from home in Canberra. I didn't have a lot of spare time this weekend so I only had about an hour at the exhibition to have a good look around.

This was the first model railway exhibition in Bungendore, held at the multi-purpose hall of Bungendore Primary School. There were about fifteen layouts (HO and N scale) and about half a dozen commercial traders. It was a good balance for a relatively small exhibition.

Most of the layouts were exhibited by local Bungendore or Canberra railway modellers. The layouts included Crestwood, Eskbank, Little Austria, Nicholls Siding, NMRA (ACT Division) US layout, Sodor, Sydney Central, and the Canberra Monaro N scale Group's AusTrak modular layout. Springfield Junction (Hills Model Railway Society), South Creek (NSW N scale Group) and Strawberry Hills (Sydney N scale Model Railway Club) made the trip from Sydney.Yallah came from the Illawarra.

I have included a few photos from my short visit today.

The first two photos are from the Eskbank (circa. 1899) layout (HO scale). Eskbank is a real location near Lithgow (NSW) at the western foot of the Blue Mountains. The first photos shows (or should that be shews?) a short freight consist moving slowly through Eskbank station. Note that the freight car just behind the loco is a wagon hauling coal gas. The second photo shows a U105 on the turntable at Eskbank. The U105 Baldwin locomotive is based on a Roundhouse model (I think) and the turntable is by Fleischmann.


The next photo is from Ross Balderson's Sydney Central (N scale). The photo show the trams along Eddy Avenue, a common sight in 1958, the period in which the model typifies.


The next three photos show generic NSW locations on typical exhibition-style layouts (plenty of colour and movement). In order, the layouts are Crestwood (HO), Nicholls Siding (HO), and South Creek (N scale).

The last three photos are from the US-inspired Springfield Junction (HO) layout. I saw this layout previously at the Beecroft Exhibition a couple of months ago.This layout operates using NCE digital command control (DCC). Note the way in which the throttle sits when not in use on the layout.


Saturday, 15 May 2010

Out of the armchair

Today was a beautiful crisp and sunny day in Canberra. Yet it all started routinely enough. By mid-morning, I was well into the morning chores. A little later, I got a phone call from one my of train photography mates, Andrew (that's Andrew with an R.).  Andrew told me that a good "lash-up" was on its way south and that we should meet at his place and then drive to Gunning to take some photos.

It was a simple choice: continue with the morning chores or head off to Gunning for train photos.

I managed to drive to Andrew's house in north Canberra pretty quickly and then we headed off together to Gunning.  By now, it was lunchtime and I was just as keen to get to Gunning for an egg and bacon roll as I was to take some photos!  We managed to get to Gunning in good time and I stopped for that roll, much to Andrew's concern that we'd just as likely miss "the shot" if I wasn't quick enough!

No worries. We headed north out of Gunning and found a spot called "razorback" in the Cullerin Range (between top and bottom bridges for us "locals"). Dazza was already perched on one of those big granite tors and it wasn't long before we were joined by three or four other railway photographers.

We didn't have to wait long. The train with four locos and a long tail of empty grain hoppers snaked around the big, wide curve in perfect sunshine.  Kevin Schultz was at the reins of EL60 with a couple of T's (385 and 386) and VL 352 behind for extra horsepower. Good stuff!

Then we all raced back to our cars for the chase; back in the direction of Gunning and Yass. Andrew and I managed to arrive at the road overbridge at Gunning just as the train peeled around the curve and we took a few quick shots. We then took off for the Hume Highway and then drove just south of Jerrawa for the next shot, and then onto Binalong for this last shot.


It was a great day to be out of the armchair and into the sunshine.

Thursday, 6 May 2010

New Zealand Model Railway Convention - addendum

I want to finish off my description of the New Zealand Model Railway Convention by thanking the organisers of the event and the individuals who gave presentations and clinics. I also want to thank the people who displayed their layouts in the hall at the Convention and the people who displayed their home layouts on the layout tours. Finally, I want to say that I thoroughly enjoyed the conversations and hospitality of all the people I met and chatted to at the Convention.

The Convention was a great success, but there was more. Whilst there were no official layout tours on Monday 5th April, since the Convention was over, some local modellers gave times for an open house during the day.

I was exceedingly lucky to get to the home of Peter Ross, with barely a minute to spare, on my way home late in the afternoon from a day trip to Akaroa. Peter's layout, Amberley, is an S scale (1:64) work-in-progress based on the line between Amberley and Waipara, not too far north of Christchurch, and set in the 1950s. Peter was kind enough to invite me in and spend time talking with me about the layout well past the open house closing time.  Thank you Peter - and what a superb layout!


Until next time....

Sunday, 20 September 2009

Modelling the Railways of SA Convention is over for another year

I returned home to Canberra this afternoon after spending an enjoyable day yesterday at the Modelling the Railways of South Australia Convention in Adelaide. I think that the attendance at the convention this year would have been one of the biggest since the auditorium looked pretty full. Congratulations and thank you to Les Fordham and the team who put together another great convention and another set of quality notes.

One of the key features of the convention this year was signal cabins. Over here in NSW, we call them signal boxes. Anyway, David Goedecke gave a great presentation on Modelling South Australian Signal Cabins, including detailed prototype notes and photos; describing how he built a model of the cabin at Ambleside. What was especially interesting was how David became interested in signal cabins. David told us that when he was a young boy he came upon a book in the local library about the life of a signalman in England - "Signalman's morning" by Adrian Vaughan. After reading this book, David became fascinated with signal cabins and their operation. I can well understand from my own childhood experiences where interests in later life originally formed. Random childhood events often have enormous impact on our lives, albeit at the time, seemingly so innocuous!

Signal cabins were clearly of interest to other people as well since there were plenty of examples in the model display area, mostly in HO scale but at least one in N scale. I have included photos of just three examples showing HO scale models of Ambleside (Goedecke), Adelaide (Gavin Thrum), and Penfield (Vic Kollosuhe).


I also really enjoyed the presentation from Lindsay Baker about oil depots. Oil depots are a particular favourite of mine. It was good to hear first hand from Lindsay who had worked in the industry for many years for Golden Fleece. Lindsay also gave us an insight into how he has used oil depots on his HO scale layout - based on Naracoorte - called the South Eastern Division. Lindsay highlighted the different types of petroleum products carried and distributed by rail, as well as mentioning the diversity of customers that kept oil depots in business. In addition, Lindsay reminded us that oil depots were supposed to be securely fenced! The combination of prototype information and his description of how he uses oil depots on his superb home layout was a great way to showcase an effective and believable lineside industry. Lindsay modelled an oil depot for the display area and I have included a photo below.


And speaking of the display area, there was plenty to see including signal cabins, SAR cabooses, locos and rollingstock. There was an even a small model of a Country Fire Association (CFA) shed and surrounding infrastructure. But possibly the pick of the display was Frank Kelly's superb model of SAR locomotive No.1 and train - photo below.


Other presentations from the day included early passenger cars of the Ghan by John Beckhaus, the 600 class steam engines of the SAR by Bob Burford, modelling SAR/VR joint stock Pullman passenger cars by Noel Potter and Stuart Hicks, SAR Webb cabooses in N scale by Mark Wilson, and photos of modern rollingstock by Noel Potter. The special guest speaker was Les Smith, ex-Australian National Chief Mechanical Engineer, who closed the day with a fabulous account of some of the goings-on during the AN period - sometimes fact is stranger than fiction!

Finally, in addition to the presentations, I really enjoyed catching up with people and meeting some new people (even a couple from Canberra) over the course of the day. All in all, it was another great convention and well worth the trip.

Sunday, 19 July 2009

Winmar - first photos

To illustrate some of the points mentioned in my previous blog post, I have included some photos from the archives of my Winmar layout (thanks, Bob!). The photo of the track diagram on the control panel was taken just before the whole layout was put into storage a couple of months ago. The front face needs the masking tape removed at the bottom and another coat of paint.

The layout diagram shows the station (the black horizontal bar at the front) with the main line and a platform road linking both the loco depot (on the right) and the Lake Hume branch and oil depot on the left. There are three loop sidings (including the grain loop - inner left) and a headshunt. The dead end factory sidings (there is only one now) are in purple. Towards the top tight quadrant of the panel diagram is where an industrial siding forks off from the main. Both the main line and the industrial siding curve around to meet the tracks on the traverser.


The control panel is a box made from plywood with a lid that opens at the front using a piano hinge. The four panel meters measure current and voltage for each of the two controllers (cabs). The top row of switches are numbered and have blue/orange lights to indicate power and cab (one or two) for the fiddle yard sidings. The bottom row of switches are numbered for the power blocks on the display side of the layout. Three switches to right of the masking tape are for the three turntable roads in loco. The back of the panel box is open for access to the wiring and to house a couple of transformers. The panel box sits on an upside-down baby change table (that was no longer required!) which has been slightly modified with castors and elbow rests. Bob Stack drew up the layout diagram for me using a computer software drawing program. I laminated the plan and stuck it to the control panel box. I still have to finish the edging.

The next two photos show the front of the layout from different ends. The first photo looks down the straight from the Lake Hume branch end of the layout. You can see in this early photo that the sharp S-bend is still in place on the left. The replacement S-bend now takes the siding about four inches into the operating well but maintains the same length. The second photo shows the turntable at the loco depot end of the layout. A bicentennial liveried 80 class is visiting to add some colour to the shot.


This last photo shows the unfinished twelve tracks on the traverser. All the tracks are down now and wired up. Note the handles (on both sides of the traverser) for moving the traverser in and out to match up the selected fiddle yard track to the main line of the layout. You can also see one length of the aluminium framing that holds the layout baseboard grid together.


When I get my other computer tower connected up to a screen, I'll find and then copy some more photos of Winmar to my "active" computer for uploading to the blog.

Sunday, 14 June 2009

Bowen Creek and Muskrat Rumble photos

As promised, here are a few photos showcasing Bowen Creek and Muskrat Rumble from last week's Epping MRE. The first four photos show Bowen Creek.


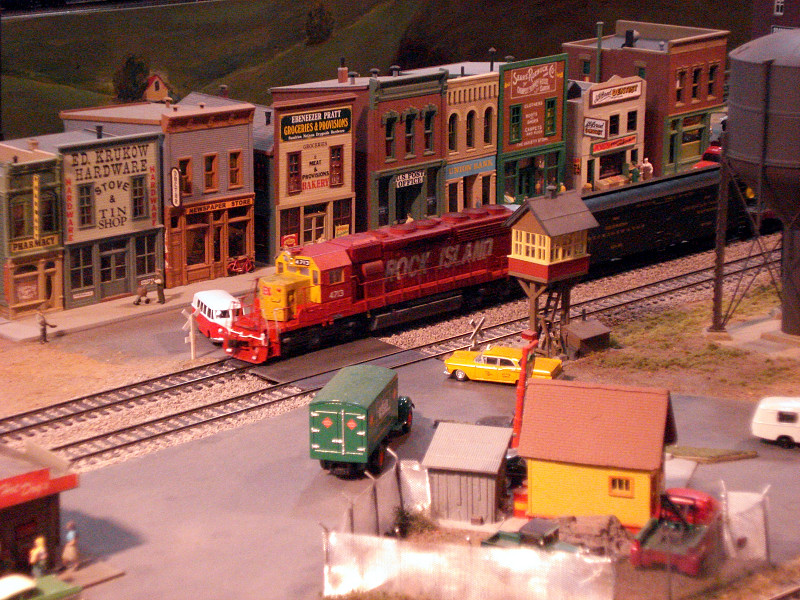
The next three images showcase the three key scenes from Muskrat Rumble. As you can see, the three scenes are quite distinctive and extremely well detailed.


These images are just a few sample views of these two layouts. If they are exhibited again, I thoroughly recommend a visit to see them in real life.